Board + Batten Accent Wall for Under $50
- Karly and JP

- Jul 27, 2020
- 5 min read
Updated: Jun 8, 2021
Y'all know I love an accent wall. We put our first accent wall in the nursery in 2017 using bold, horizontal black and white stripes. Last year we did our second, a navy accent wall in what is now our toddler's room as we were preparing for our second child. And now we have this one, which is my absolute favorite.

When I was inspired to makeover our living/kitchen/dining room with fresh paint, I had originally envisioned a wallpaper or stencil for this wall. Something eye-catching, yet tasteful. I even once commented on an IG picture from Bobby Berk asking if three accent walls was too many (never heard back, btw). Something just didn't feel 100% with my original vision. I wanted something that made a statement, but also that I could live with and enjoy for a while. An vibrant pattern didn't seem to match that feeling.
And then I had the idea of a textured accent wall.
As I began scouring the internet for inspiration, I saw so many options. There are some really beautiful homes out there. There are walls with intricate angles, and varying thicknesses of the wood. There are walls with geometric patterns. And there are walls with abstract designs or murals. All of them statement pieces, and all of them showing personality.
So what did we want our living room wall to say? We're not in college anymore and we've owned our home for several years. We've matured and we wanted our house to reflect that while still showing our personalities. I noticed I kept coming back to mono-chromatic, symmetrical, board and batten walls. And then I came across a post from blogger and IG influencer Janene Crossley. Of course, I first admired her adorably coordinated family. BUT THEN I saw the accent wall. It was obvious to me that it was that style that I had been searching for all along. We did a little research and talked about how something similar would look in our house, so we did our interpretation.
Here's how we got this look: Materials
* 1 4'x8' of 1/2" MDF. You could use plywood here, but MDF is flatter and holds up better during ripping and cutting. MDF stands for medium-density fiberboard, and is an engineered wood product. This is what makes it reliably flat, whereas plywood is more likely to have bowing and tear-out. * Construction Adhesive
* Paintable Caulk
* 1 1/4" Brad Nails
* Wood Filler * Painter's Tape * Paint (We used #SherwinWilliams Alabaster)
Tools
* Table Saw * Miter Saw * Brad Nailer * Tape Measure * Sanding Block

Step 1: Measure and decide on your look. Do not skip this step. Every wall is different and, unfortunately, walls can vary in width and height from one side to the other (I know, don't get me started). Measure the height and length of your wall and, if you have molding that will stay in place, measure the height from the molding. Once you have your length and height measurements, figure out how many columns you'd like, and the width of the MDF. You can use painter's tape to mark out a portion of the design to make sure you're happy with the size. It's easier to adjust this before you get the saw involved.
Step 2: Rip your boards to width. We went with 2 1/2" wide, but you can choose wider or narrower. Every home center varies on the number or size of cuts they will make for you. We had our home center make approximate cuts to downsize the boards, and we did the final cuts at home using a table saw. All of the boards should be the same width.

Step 3: Cut vertical boards to size. We knew we wanted about 11 columns, so based on our math, the rectangles ended up being about 12 3/8" between boards. Knowing where each board would go, we measured the length at the location of each vertical board. This part was a little tedious, but our wall was taller on one side than the other (by about 1/2") so we wanted to make sure each board fit snugly. At this point, it's important to make note that we also cut a 45 degree bevel (angle) so the MDF would align perfectly with the top cove of the crown molding and the bottom of the bead of our baseboards. You don't have to bevel, but we wanted a more professional, finished look. This was another reason we decided on the 1/2" MDF -- it allowed for a more seamless transition into the molding once we beveled the boards.
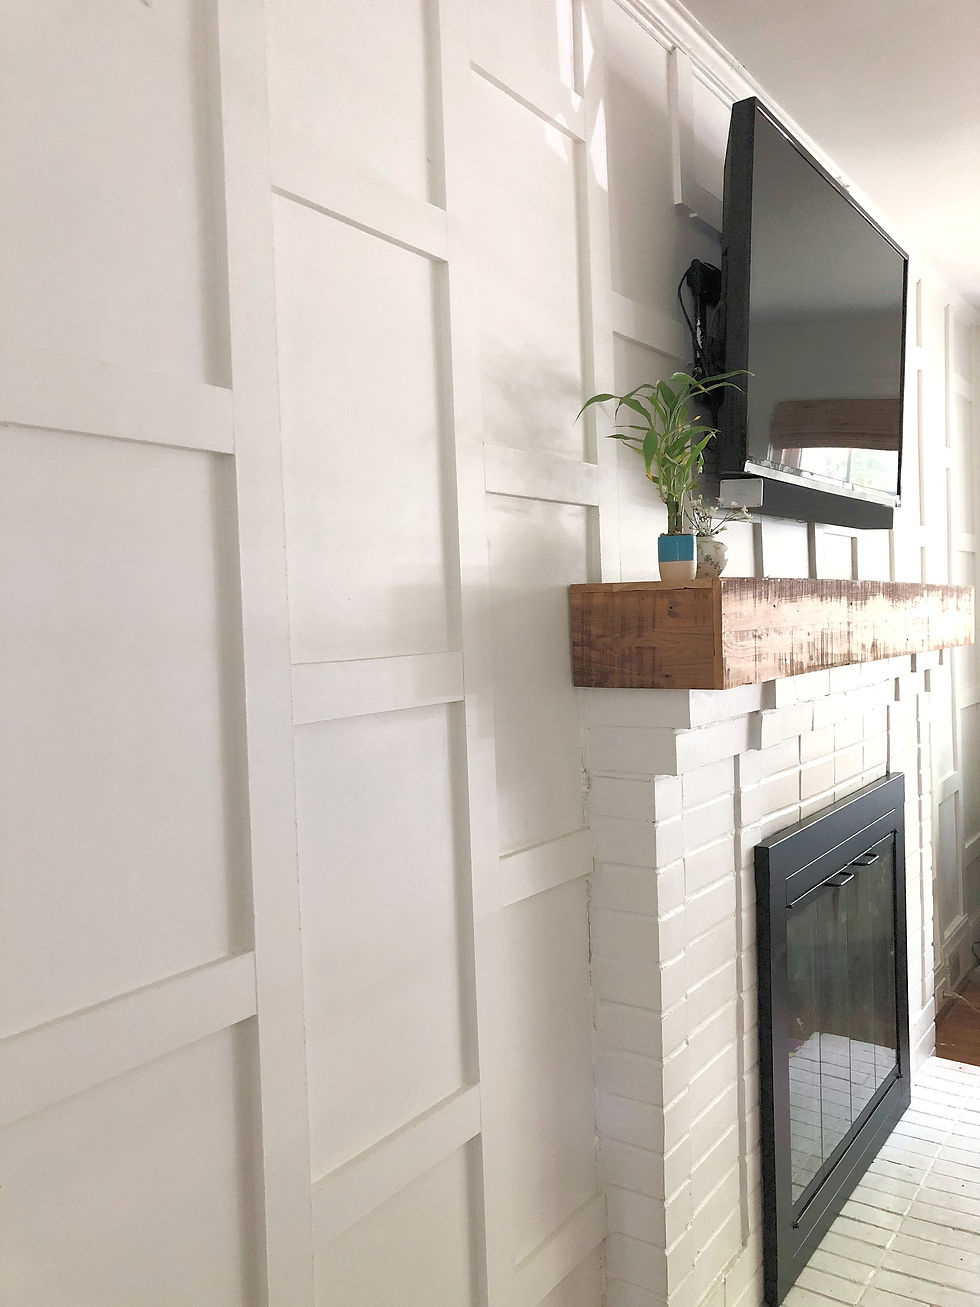
*Because our fireplace is off-center, and because we have a mounted t.v., the vertical boards around the fireplace are different lengths. The width between the fireplace rectangles are also slightly off (shorter) from the others because of the way we rounded our math. BUT you can't tell, and chances are you'll have to make some of those decisions, too.


Step 4: Attach the vertical boards one at a time. To save time and energy, AND to give consistency, cut a spacer the exact width you'd like your rectangles to be. Use the spacer to determine where each vertical board should go, referencing the board before it. Attach the boards using construction adhesive and brad nails. Start from the ends of the wall first and work towards the center.

Step 5: Cut the horizontal boards. Using your measurements you found in step 1 (and if you had any weird spacing issues as you went along like we did over the fireplace), set up a stop block and use a miter saw to cut. Step 6: Attach the horizontal boards. To get the staggered effect, you'll need to have two measurements to use for the first board in each column, alternating the distance. Using the construction adhesive and brad nailer, attach the boards. We cut two spacers for this, one for the full brick and one for the half brick to give the continuing pattern effect. *Note: don't forget to account for the width of the boards when cutting the shorter spacer. We ran into this problem when trying to get the spacing for the half-brick pattern because we originally didn't account for half of the width of the board. But don't worry, nothing was attached when we figured it out.😉


Step 7: Fill any nail holes and sand. MDF is pretty smooth already, but you'll want to use a block sander to smooth any edges or rough spots that happened while making cuts. After it's dry, sand any uneven areas from the wood filler, too.
Step 8: Caulk. This may be an added step, but it makes the wall appear seamless. Use the caulk to full any gaps. We applied caulking around all of the boarders for consistency, and used our fingers to smooth it out. Wipe any excess. Step 9: Paint and Enjoy! Admittedly this step took much longer than I expected for two reasons. One, MDF is kind of tricky to paint, but two coats still got the job done. And two, I was careful to get every side of each board.


We did this project in one weekend and only after the kids went to bed. Total costs ran us under $50, with the MDF costing the most. We used the same paint we had on hand, so we didn't incur any additional costs there. This was a board and batten first for us, but we were so pleased with the overall ease of this project!
-K
ps We really do all of our projects with two small children at home - please note the children's toys and clutter in these photos. 😂
So what do you think? Let us know in the comments!👇


Comments